

As a thank you to people for helping out with my move in to my very own flat, or simply donating me furniture or other essential items I have vowed to make everyone cake. My eldest brother so kindly offered to pick me up in his van from Ikea with a lot of flat pack furniture. To say thank you I asked him to name his cake, he chose pineapple upside down cake. I wasn't sure if he was joking at first... but decided what the hell I've never made it before so he's going to get one joking or not.
I found a Nigella recipe for Pineapple upside down cake in my copy of Nigella Express. This recipe is also available online. My quantities varied from Nigellas, so really it's however many pineapple rings and cherries your tin can hold to make this cake!
I had to buy another new pan for this recipe.. 23cm cake tin, unfortunately I couldn't find a copper one that Nigella recommended but the one I got was a TKMaxx bargain and is grease proof.
Ingredients:
- Butter to grease your tin
- 2 tbsps sugar
- 7 pineapple slices from a 425g tin of pineapple
- 3 tbsps of the pineapple juice from the tin
- 13 Glace cherries
- 100g flour
- 1 tsp baking powder
- 1/4 tsp bicarbonate of soda
- 100g soft butter
- 2 eggs
Method:
- Preheat your oven to 200 degrees and butter your tin.
- Sprinkle the two tablespoons of sugar over the buttered tin, and then arrange your pineapple slices as shown below.

3. Pop a cherry in each pineapple rings hole, and also in between them around the edge.

4. Mix your flour, baking powder, bicarb, butter, caster sugar and eggs in a bowl with an electric whisk for about 3-4 minutes or how ever long until its nice and smooth. Then pour in your pineapple juice and mix it in to make the batter thinner.
5. Now you need to get this mixture on top of your pineapple and cherries without ruining it completely. So what I did was tablespoon at a time begin to drop the mixture around the tin. When most of it was out of the bowl and into the tin I carefully spread the mixture with the back of the spoon, and tipped (scraped) any remaining mixture on top or into any gaps. The mixture only just covers it.
6. Pop it in the oven for 30 minutes.
7. Once done take it out of the oven and carefully run a spatula along the sides. This is where my grease proof tin came in very handy as it had made the cake quite loose in the tin. Leave it to cool a little while as it will be hot to touch.
8. Once cooled but still warm put a tea towel over the top and flip the cake upside down! Then leave it to cool on a wire rack.
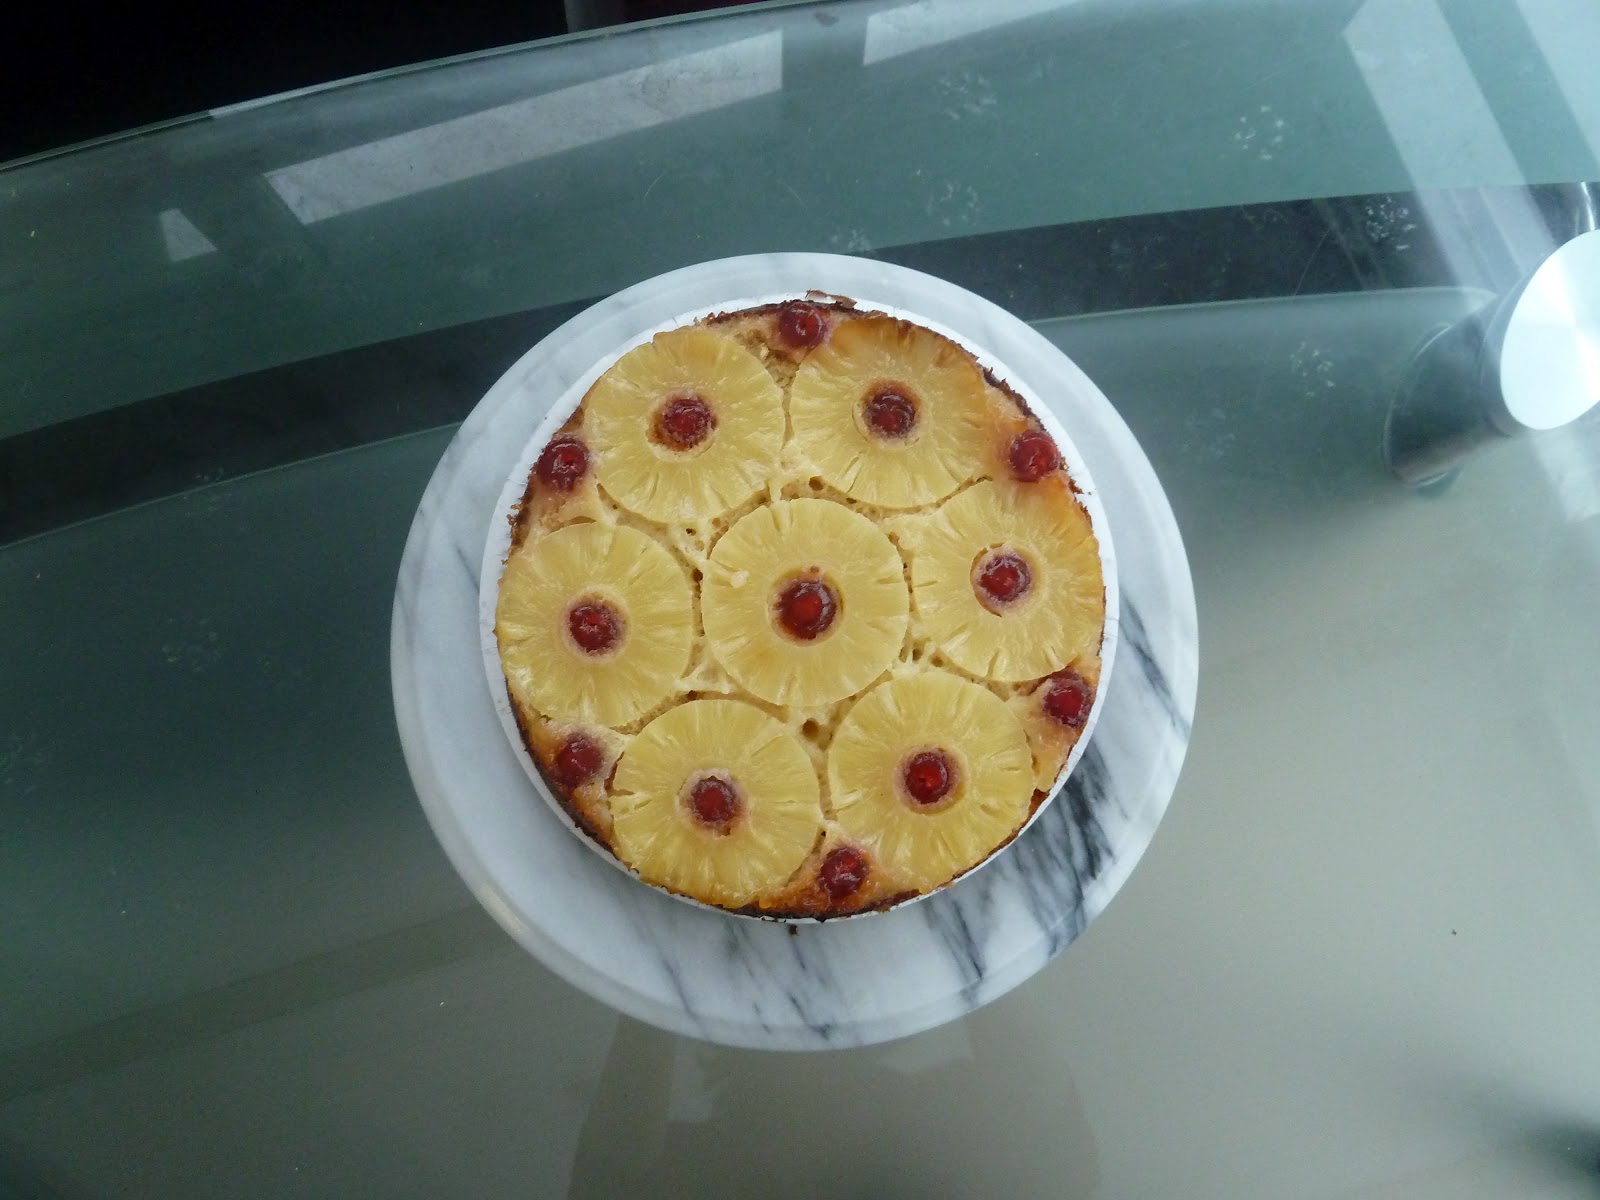
My cake is on a paper plate so apologies for presentation! However my only mode of transporting this cake was to sandwich it between paper plates and wrap with cling film.
The final result is very satisfying as it is such a symmetrical and good looking cake. It's so simple and quick to make too!
I didn't get to try any as I gave it all to my brother for him to take away.


(Please ignore the naughty cat paw prints on my table! I hadn't notice them until I had taken the pictures!)
I love the symmetry of an upside down pineapple cake too. It must have been hard giving it away without getting to try a piece.
ReplyDeleteI think I may have to make another one so I can try it out myself! Not a massive fan of cooked pineapple however... I hate it on pizzas etc.
ReplyDelete